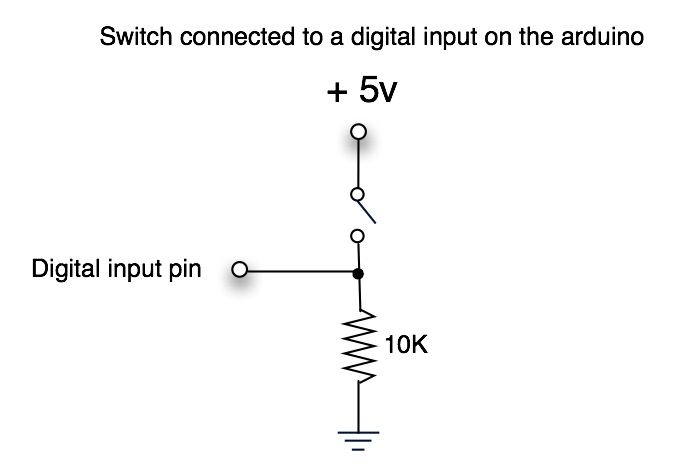
(sketch based on illustrations from Physical Computing and Making Things Talk)
The simplest code to get a reading from a switch is the Button example from the arduino tutorials.
Here is a modification of this code illustrating the principle of edge detection, just sending out a value whenever the state of the switch changes (and not everytime the arduino checks the state of the input pin). This would be useful for instance if used together with tinker.it´s applescript proxy
int ledPin = 13; // choose the pin for the LED
int inputPin = 2; // choose the input pin (for a pushbutton)
int val = 0; // variable for reading the pin status
int prevState = 0;
void setup() {
pinMode(ledPin, OUTPUT); // declare LED as output
pinMode(inputPin, INPUT); // declare pushbutton as input
Serial.begin(9600);
}
void loop(){
prevState = val;
val = digitalRead(inputPin); // read input value
if (val != prevState) {
if (val == HIGH) { // check if the input is HIGH
digitalWrite(ledPin, HIGH);
Serial.print(“A”);
} else {
digitalWrite(ledPin, LOW);
}
}
}
And finally a simple example to show how you could work with multiple input:
int inputPin1 = 2;
int inputPin2 = 3;
void setup()
{
Serial.begin(9600);
pinMode(inputPin1, INPUT);
pinMode(inputPin2, INPUT);
}
void loop()
{
Serial.print(“A”);
Serial.println(digitalRead(inputPin1));
Serial.print(“B”);
Serial.println(digitalRead(inputPin2));
delay(100);
}


Leave a comment